March 7, 2022

How to Clone Existing Windows to USB and Make it Bootable

 Is it possible to copy Windows 10 to USB and make it bootable? Yes, you can clone existing Windows OS to a USB drive and then take it to anywhere. If needed, you can boot from the USB and then work in the familiar Windows OS.  How to do that? iSunshare WinToGo Genius can help you clone everything in your working OS to the USB drive and make it bootable. It is easy to do the cloning with WinToGo Genius.

clone existing Windows to USB


Preparation to clone Windows to USB drive

When your Windows computer fails to boot or crashes, the bootable USB with the Windows system can help you back to work quickly. So, in order to make Windows OS successfully clone to the USB drive, what should you prepare?

The reliable Windows to Go Creator.

Yes, you need the help of professional Windows To Go Creator –iSunshare WinToGo Genius. If you just copy and paste the Windows files and data to the USB drive, it is difficult to make the Windows bootable from USB. But for iSunshare WinToGo Genius, it can clone the configurations, settings, and data of the Windows OS to your USB drive. And this process is made in PE mode, in which there is no app running in Windows OS, to ensure 100% cloning. 

Get a larger USB drive

The USB drive should be large enough to store all data from the system drive. It should be larger than the used space on your system drive. You can choose the USB flash drive or the external hard drive that can be connected with the USB-to-SATA adapter. Also, it is better to choose the empty USB drive as this cloning will destroy all the data on the USB.

How to Clone Existing Windows to USB

iSunshare WinToGo Genius can work in any edition of Windows 7/8/10/11, which makes it easy for users to copy the Windows to USB. Besides, you can also create portable Windows on USB without installing from ISOimage file.

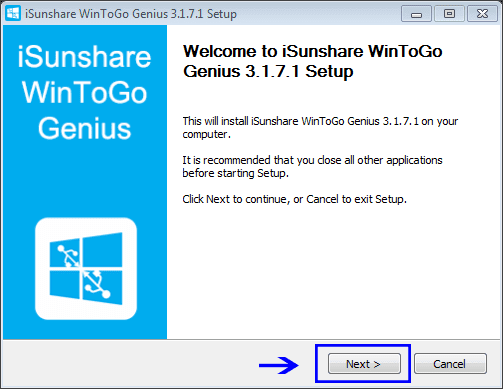
Step 1: Install iSunshare WinToGo Genius on your computer. At the same time, plug the USB drive into your computer.

install iSunshare WinToGo Genius

Step 2: Select the USB drive to store everything about your Windows OS.

select the USB drive

Step 3: Choose the first option Use the native system and then you can check two options to make PE:  Use the PE file on your computer or Use the PE file you downloaded. You can choose either one to proceed with.  As there is the built-in PE file on the computer, you can directly choose to Use the PE file on your computer and click the Start button.

use the PE file on your computer to make PE

Step 4: Here comes the warning—this operation will format the USB drive. You can click Yes to continue if you have backed up the data on your USB drive.

format USB warning

Step 5: The software will start to make PE in the USB drive with your built-in PE file. You just need to wait for the ending. With the accomplishment of the PE, you can click OK and then close the software.

finish PE production

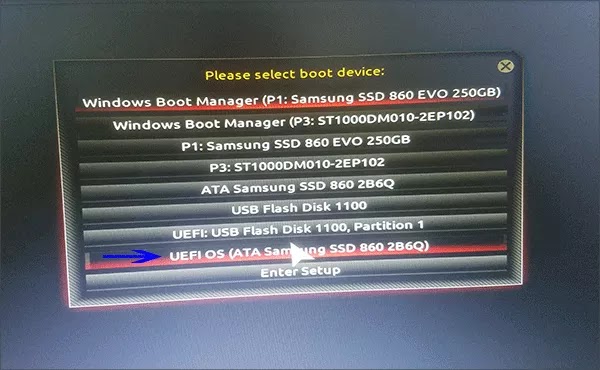
Step 6: Restart the computer and then press F12 or other keys to enter the BIOS boot settings. After that, choose to boot the computer from a USB drive.

boot from USB drive

Step 7: In no time, iSunshare WinToGo Genius will begin cloning the existing Windows OS to your USB automatically. You just need to wait for the ending.


copying Windows to USB

After that, you successfully clone the existing Windows to USB. You can take the USB to any Windows computer and boot from it to get into the identical Windows working environment.

Related Articles:

  1. How to Clone External Hard Drive to another External Hard Drive in Windows
  2. How to Clone USB to another USB in Windows 10/8/7
  3. How to Create A Windows To Go USB Drive without the Enterprise Edition
  4. How to Run Windows 10 from USB without Installing 


February 16, 2022

How to Import Photos from iPhone to PC

 If there are many photos on your iPhone and you want to transfer photos from iPhone to PC, how to do that in the fastest way? There are many ways for you to import photos from iPhone to a Windows computer. You can choose the one you preferred to import iPhone photos.


import photos from iPhone to PC

Way 1: Connect iPhone to PC and directly copy iPhone photos

You can connect the iPhone to the PC with the original USB cable. After that, allow the computer to access photos and videos on the iPhone. Then, go to open This PC and choose Apple iPhone ( the device name), and access Internal Storage> DCIM. Here you can find different folders with images and videos. You can directly copy the photos and then paste them on your PC.

import photos directly from iPhone to PC

Way 2: Import Photos from iPhone to PC via iCloud

You can enable the iCloud backup on your iPhone so that the photos will be automatically backed up to iCloud when iPhone is connected to a WiFi network. After that, you can import photos from iPhone to PC on the iCloud website or iCloud app.

Step 1: Sign in to icloud.com with the Apple ID linked to your iPhone.

sign into iCloud

Step 2: After entering the iCloud home interface, you can go to click the Photos option.

click Photos

Step 3: In no time, it will load all the photos which are backed up from your iPhone. You can select the photos and then click the Download button.  Instantly, the photos will be downloaded on your Windows PC.

select photos to download from iCloud

Finally, you can move the download zip to any folder of your computer and decompress it.  You will see photos from iPhone soon.

Way 3: Transfer photos from iPhone to PC via iSunshare iDevice Genius

iSunshare iDevice Genius is a useful iPhone cleaning software that can help to delete iPhone junk files. But it can also help users to export photos, videos, documents, and other large files to your PC. Before that, you are able to preview photos one by one and choose the needed photos to export.  It is also possible for you to classify photos by Year, Month, or Day.

Step 1: Connect the iPhone to your computer and then open the iSunshare iDevice Genius program.

Step 2: Fast Cleanup option is selected by default. Then you can click the Scan button to get more details.

click Scan to scan iPhone

Step 3: After the scanning, you can directly go to the Pictures section and click the Clean button.

click Clean in Pictures section

Step 4: In this interface, you can double-click to preview the photo. And then you can choose the picture one by one. If you want to transfer all photos from iPhone to PC, you can check the Check all option on the upper left corner.

Check all photos

Step 5: Click the Export button and then choose the folder to save these photos. After that, the software will start exporting photos to your PC automatically.

click Export

Step 6: The files are successfully transferred to your PC. You can go to the destination folder to have a check. 

Photos are transferred successfully

Related Articles:

  1. How to Transfer Contacts from iPhone to PC without iTunes or iCloud
  2. Fixed--Can't Import Photos from iPhone to Windows PC
  3. How to Delete Photos from iPhone on Windows 10 PC
  4. How to Transfer Photos from one iPhone to another without iCloud 


January 6, 2022

How to Backup Different iPhones on the Same Windows Computer

 I and my wife both using iPhones and we just got one Windows computer. Of course, both of us want to backup the phones regularly. But iTunes can not intelligently recognize they are two different iPhones and make the backup. Is there a way to backup two iPhones to one computer?”

I came across this question on the Reddit forum. Many people share their answers to this question. Some said you can just backup the two iPhones to one computer using one Windows account as the data will not be mixed; some said you can just go ahead to set up the second iPhone as the new iPhone and restore the backup because there is no data loss; Some recommends the third-party tool to finish the iPhone data backup. After going through these answers, I also have my own doubt: Can iTunes help to backup different iPhones on the same Windows computer?

The answer is definitely “Yes”.  You can backup different iPhones on the same Windows computer via iTunes. In order to verify this answer, several iPhones in different models are tested here.


backup different iphones in one same Windows computer


Test 1: Backup Two iPhones on One Windows Computer –Both can Easily Back up

In this test, iTunes does not log in to any account. And the two iPhones are connected separately.

Step 1: Connect iPhone 6s with the Windows computer and run iTunes. iTunes can quickly detect the iPhone.

Step 2: Go to click the small iPhone icon and then all information about the iPhone is classified. Hit the Summary tab on the left menu and then get iPhone 6s details and Backups parts.

Step 3: Check the box of This Computer and then click the Back Up Now button. iTunes can help to automatically back up the iPhone 6s data immediately.


back up one iphone to computer

Step 4: After the completion, disconnect the iPhone 6s and then connect another iPhone –iPhone 8.  Next, just repeat the operations in Step 2 and Step 3, the iPhone 8 is backed up to the Windows computer in minutes.


back up another iPhone to computer

Both backup processes is completed successfully and did not come across any issues.  The two iPhone for testing is in the same iOS version.

Test 2: Backup Two iPhones on One Windows Computer –The Second One Needs to Set up as New iPhone

Another iPhone is chosen here for test—iPhone XS.  I plug the iPhone 8 out and reconnect the iPhone XS with the computer. At this time, when iTunes is opened, I only got the Welcome to Your New iPhone window. After choosing to set up the iPhone XS as the new iPhone, iTunes will know this iPhone is another device and create another record. If you insist in restore the iPhone from backup, actually, you will lose all the iPhone data and restore from other iPhone’s backup.


set up another iPhone as  new iPhone

 To get this issue solved, I search online and find the solution: Try to connect the two iPhones in different Windows account and then precede the iTunes backup. It means that you need to create two accounts to sign in to Windows. But in my opinion, I would rather try other ways to backup different iPhones on a computer.

Alternative Ways to Backup Multiple iPhones on the Same Windows Computer

Yes, from the above two tests, it seems that iTunes is not the best choice to backup different iPhones on the same Windows computer. I found the alternative tool—iSunshare iSyncGenius. This software can help to transfer iPhone data to Windows computers quickly and safely. What’s more important, it can separately store the backups for different iPhones even the backup path is the same.  Amazing? Yes, you can backup as many iPhones on one computer safely. Let’s see how it achieves.

Step 1: Connect the iPhones you want to back up to the Windows computer.  It is no need to connect the iPhone separately.

Step 2: Run iSyncGenius and then the backup interface is on.  You can click the drop-down icon on the Device model to choose the iPhone which you want to backup firstly. Here, iPhone 7 is chosen.  After that, click the Next button to continue.


select iPhone to back up

Step 3: In the next interface, All Backups are selected by default. This function is similar to iTunes Backup Now. You can get the listed data backed up after finishing.  After that, click the Choose button and pick the destination to save your iPhone backup data. It can be anywhere on your Windows computer.  When the backup path is set, just go to click the Start button to begin the process.


set backup path to save your iPhone backup

Step 4: The iPhone data will be backed up in minutes.  Then you can click the Finish button and repeat Step 2 and Step 3 to back up other iPhones.


finish iPhone backup


In the end, you can go to check the backup files in the destination folder. As I saved the backup in the same folder, I can find all those iPhone backups conveniently.


multiple iPhone backups in Windows computer

Someone may ask how to restore the backup if you need it. Don’t worry; you can also utilize the Restore function of this software to restore the iPhone backup. 


Related Articles:

  1. How to Transfer Backup Data to New iPhone
  2. How to Backup iPhone to Windows PC
  3. How to Backup iPhone to External Hard Drive on Windows and Mac
  4. How to Backup Your iPhone Through iTunes 

October 31, 2021

How to Transfer Contacts from iPhone to PC without iTunes or iCloud

 Contacts play an essential role in our lives.  In today’s digital life, you have many activities that are associated with contacts. For example, Facebook will recommend your friends, according to your iPhone contacts.  Thus, it is highly recommended to export all contacts from iPhone to your PC.  In this article, we will share with you the details about how to transfer contacts from iPhone to PC.

transfer contacts from iPhone to pc

Way 1: Backup Contacts from iPhone to PC via iTunes

 iTunes is well known to all Apple users as it offers a convenient way to sync iPhone data to the computer. But to backup iPhone contacts from iPhone to Windows PC, you need to backup all the iPhone data as iTunes does not allow you to backup only contacts to the computer.

Step 1: Update your iTunes on the computer and then plug the iPhone into your computer. iTunes will detect the iPhone and sync the data.

Step 2: You need to tick the iPhone icon and click on the Summary option. After that, you can see the Backups part in the right panel.

Step 3: Choose This Computer option under Automatically backup part and then click on Back Up Now option under Manually Back Up and Restore section.

backup iPhone to this computer

Step 4:  The iPhone data is backed up.  Contacts are saved on your computer. You can restore it to your iPhone when it is needed.

the iPhone is backed up

Way 2: Export iPhone Contacts from iPhone to PC without iTunes

 If iTunes fails to sync your iPhone data but only offers the restore option, you can use iCloud to export iPhone contacts from iPhone to PC.

Step 1: First of all, you should enable Contacts to sync on iCloud on your iPhone.  Just go to Settings > iCloud > Contacts and then turn it on.

Step 2: Sign in to the iCloud official website and then click on the Contacts option.

sign in iCloud and choose Contact

Step 3: Then all contacts on the iPhone will be loaded. You just need to click on the setting icon on the bottom-left corner and then choose Export vCard. In no time, the contacts will be downloaded on your PC.

export contact to your PC


Way 3: Transfer iPhone Contacts to PC without iTunes and iCloud

 When your iCloud is out of storage and iTunes fails to back up the iPhone data, how could you backup contacts to the Windows computer? iSunshare iSyncGenius offers you a much easier way to transfer only contacts from iPhone to PC.  You can keep multiple contact files on the computer.

Step 1: Build the connection between the iPhone and your PC via the USB cable. After that, open the application. At the same time, unlock your iPhone and click Trust in the pop-out box that asks for your permission.  In no time, iSyncGenius will recognize your iPhone.  If the iPhone is set with the backup password, enter the password and click on the Next button.


load iPhone in iSyncGenius

Step 2: Click on the Classified backup option and then iSyncGenius will load the iPhone data. Now tick the Contacts option and set the path to save the contacts backup file.  Afterward, click the Start button.

select Contact option to backup

Step 3: When the process ends, you can go to view the contacts on your Windows computer. They are saved as XML file. 


Related Articles:

  1. How to Backup iPhone to Windows Computer with or without iTunes 
  2. How to Transfer Photos from iPhone to Laptop on Windows 10
  3. How to Restore Contacts on My iPhone from Backup 
  4. How to Sync iPhone to iTunes after Passcode Forgot  

September 27, 2021

How Can I Edit A Secured PDF without Password

 “I got a PDF from my teammate and I was going to edit some of the content. But when I entered the password, it says the permission password is wrong. Now I failed to contact my teammate as he was on holiday. So, how can I edit a secured PDF without a password?” 

Generally, when we secure the PDF with a permissions password, we do not want others to copy, edit or print the content. But when you forgot the PDF permission password, how to edit a secured PDF without a password? In this article, we summed up three common methods for you. 

Method 1: Official Method from Adobe Acrobat 

Method 2: Manually Remove Edit Restriction of PDF via Google Chrome 

Method 3: Easy to Edit a Secured PDF with Professional PDF Permissions Remover 

Method 1: Official Method from Adobe Acrobat 

We found a solution from the Adobe help center, which enables users to make the secured PDF editable. But this method can only apply to the situation that you are the PDF owner.

Step 1: Open the secured PDF with Acrobat DC.

Step 2: Access File >Print. 

Step 3: In the pop-out prompt, select Adobe PDF as the printer and then hit the Print option. 

Step 4: Enter a new name for the PDF file and then click on the Save button. After that, you can get a new PDF file without the limitation. You can open and edit it freely in Acrobat. 

print option

Method 2: Manually Remove Edit Restriction of PDF via Google Chrome 

There is a built-in PDF reader in Google Chrome. You can take advantage of it to unsecure a secured PDF file. But you must make sure that the PDF print function is not restricted. Otherwise, you will not succeed in removing the PDF permission password so as to edit the PDF. 

Step 1: Launch Google Chrome and then drag & drop the protected PDF into Google Chrome browser. 

Step 2: Click on the Print icon once you access the PDF. If there is a document open password, you need to enter the password to get the PDF viewed. 

Step 3: Check the Save as PDF option and hit the Save button. 

Step 4: After that, you can open the PDF in Adobe Acrobat again and edit the content in your way. 


Method 3: Easy to Edit a Secured PDF with Professional PDF Permissions Remover 

There is a much easier way to remove the limitation on PDF content. You can try the professional PDF password permission remover tool—iSunshare PDF Unprotect Genius to regain the ability to edit, copy and print. This tool deserves your trust as it would never do harm to the PDF content. If you forgot the PDF permissions password, this program will help to remove the restriction of PDF in minutes. What a time-saving tool! 

iSunshare PDF Unprotect Genius gives you the option to open the unprotected PDF directly without entering any password. Moreover, it supports you to remove the secured PDF with the known document open password. 

Step 1: Download and install the application on your Windows computer. 

install iSunshare PDF Unprotect Genius

Step 2: Click the folder icon on the first section to import the secured PDF. 

import secured PDF

Step 3: The default destination location is on your computer desktop. You can change the location to save your unprotected PDF.

set PDF destination path

Step 4: Click the Start button to remove the PDF restriction. In the end, a message box will pop up to notify you that “Successfully Removed! Open it now?” You can click on the OK button to view and edit the content. 

successfully removed PDF restriction


March 20, 2021

How to Fix My iPhone Keeps Turning Off Randomly

 Do you encounter your iPhone keeps turning off randomly by itself? It must be very frustrating. Take it easy! This post is specially prepared for this situation. In this post, we will explain why your iPhone keeps turning off randomly and show you five effective methods to fix this issue in ease.

  • What causes an iPhone to keep shutting down randomly?
  • Method 1: Force restart your iPhone
  • Method 2: Update iOS version to the latest
  • Method 3: Fix with iOS repair tool without data loss
  • Method 4: Restore with iTunes in Recovery Mode (loss data)
  • Method 5: Contact Apple Support
  • Conclusion

What causes an iPhone to keep shutting down randomly?

There are various kinds of reasons why an iPhone keeps shutting down randomly. Some main causes are listed as follows.

Unstable iOS update. The process of iOS updating is interrupted for various reasons causing there is something wrong with iOS. As a result, iPhone keeps shutting down suddenly.

Hardware Problem. If iOS is stable, it is very likely that there is something wrong with hardware like screen or motherboard. A broken hardware component could be the culprit of iPhone turns off randomly.

Unstable driver: If a driver on the iPhone is unstable because of damage to the internal system of the iPhone, it may also cause the iPhone keeps turning off randomly.

Method 1: Force restart your iPhone

Restarting your iPhone is a simple and worth trying way to fix any issue of iPhone. If a normal restart cannot work, you can try to force restart it. The ways to force restart iPhone vary depending on iPhone model.

iPhone 8 and later

Press and release the Volume Up button. Then press and release the Volume Down button. Finally, press and hold the Side button and then release when the Apple logo appears.

iPhone 7/7 Plus

Press and hold the Volume Down button and the Power button at the same time and then release both when the Apple logo appears.

iPhone 6 and earlier

Press and hold the Home button and Power button at the same time and then release both when the Apple logo appears.

how to force restart iphone

Method 2: Update iOS version to the latest

A new iOS version can fix some software issues and system bugs. If the iOS version of your device is outdated, you can follow the steps below to update iOS version to the latest to fix this issue of iPhone keeps turning off randomly.

Steps: Go to Settings > General > Software Update. If a new iOS update is available, a notification will be displayed. Then tap Download and Install. Wait for a moment and the iPhone will reboot up when the update is finished.

update ios version

Method 3: Fix with iOS repair tool without data loss

System errors could be the culprit of iPhone keeps turning off by itself. In this case, repairing iOS is the way out. iSunshare iOS Repair Genius is recommended here to fix the issue of iPhone keeps turning off randomly. As a powerful iOS repair tool, iSunshare iOS Repair Genius can fix various types of iOS problems without further ado. Such as tiktok app keeps crashing on iPhoneiPhone stuck on Apple Logo, update screen and so on.

Preparations:

1.     Download and install this tool on your Windows computer.

2.     Make sure that your iPhone is connected to computer.

3.     Install iTunes to make this tool run more smoothly.

Step 1: Firstly, launch this tool and click Standard Mode on the left side. Then click Start button on the next page. If your iPhone is well connected with computer, click Next to move on.

select repair mmode

Step 2: Then the tool will detect your device and show you the available firmware package. Click Download button to download it.

download firmware package

Step 3: Once downloaded, it will be verified automatically. Then click Repair button to start fixing your device. After a while, a popup dialog tells you it has been repaired successfully. Finally, you will get a new iPhone that can work normally.

repair iphone

Method 4: Restore with iTunes in Recovery Mode (loss data)

If you don’t care about the data on your iPhone, you can try to restore it to factory settings with iTunes. Detailed steps are listed as follows.

Preparations:

1.     Download and install iTunes of latest version on your computer.

2.     Connect iPhone to computer and put it into Recovery Mode. If a message box pops up asking if trust this computer, click Trust to continue.

Steps: Open iTunes and it can detect your iPhone automatically. Select your device when it appears on iTunes screen. Then Click Restore [your device]. On a popup window, click Restore again to confirm. It will take some time to erase your device and install iOS of new version. Once finished, your device will be factory reset and reboot up automatically.

restore iphone with itunes

Method 5: Contact Apple Support

If all the methods above don’t apply to you, there is a high probability that the hardware of device is broken such as motherboard or battery. In this case, you need to send it to Apple store to get it repaired. They can offer the best support options to help you solve all kinds of hardware issues.

Conclusion

No matter what causes your iPhone to turn off by itself, as long as you read this guide and follow the detailed steps above, your device can get back to normal in most cases. If your iPhone or iPad always encounters with system problems like stuck in spinning wheel, white screen of death or lagging and freezing, it is highly recommended to use iSunshare iOS Repair Genius to fix these issues. It can enable you to easily fix most common iOS system problems like an expert.

February 24, 2021

How to Recover Deleted Videos from PC in Windows 10

 If you unintentionally delete videos in Windows 10, is there any way to recover them? The answer is YES! You can recover the deleted videos from your computer in a high success rate as long as you get a right way. In this post, we will introduce to you three effective ways to recover videos from PC in Windows 10.

  • Way 1: Recover deleted videos from Recycle Bin
  • Way 2: Recover deleted videos with data recovery tool
  • Way 3: Recover deleted videos by Windows 10 Backup

recover deleted videos from pc in windows 10

Way 1: Recover deleted videos from Recycle Bin

Recycle Bin in Windows 10 is used to store the deleted files or folders temporarily before they are permanently deleted by user. When you delete video by accident or find that the video is lost from your computer, the first choice that you should consider is to recover it from Recycle Bin. Here is how to do.

Step 1: Double-click the icon of Recycle Bin on the desktop to open it.

Step 2: Type .mp4 in the search box in the top right corner of interface.

Step 3: The deleted videos of mp4 format will be shown on the screen. Right-click the video that you want to restore and select Restore option. Finally, the deleted videos will be restored to the original location.

recover deleted videos from recycle bin

Way 2: Recover deleted videos with data recovery tool

If you can’t find out the deleted videos in Recycle Bin, it may be deleted permanently from your computer. In this case, you can use data recovery tool to recover the deleted videos. iSunshare BitGenius is a powerful and trustworthy data recovery tool that can recover lost data from NTFS&FAT32 partition or drives in Windows computer. It can also help you easily recover the deleted videos in Windows 10. Here are detailed steps.

Step 1: Download and install iSunshare BitGenius on your Windows 10 computer.

Step 2: Launch it and click the hard drive that the deleted video located in the Hard Disk Drives section. If you remember the detailed location of deleted video, you can choose to customize a location to find it more quickly. Then click Start button.

select hard drive

Step 3: The tool will take some time to scan the deleted files. Once completed, all the lost files including videos will be displayed on the interface. Then click Filter button. In the new popup window, check the checkbox of Videos and then click Apply button. Then all the deleted videos will be shown on the right pane. Select the videos that you want to recover and click Recover button.

filter videos from the scanning results

Step 4: Select a location for the deleted videos.

select location

Step 5: At last, the deleted videos are restored to your computer. Then a tips box pops up to ask you if open the recovery folder. Click Yes button and you will see all the deleted ppt files are recovered successfully.

click yes

Way 3: Recover deleted videos by Windows Backup

There is a feature named Windows Backup in Windows 10 that allows you to back up the partition as you want. If you turn on this feature, the system will automatically back up your partition on schedule. So, if this feature is turned on in your Windows 10 computer, you can try to restore the partition to get the deleted videos back.

Step 1: Open Control Panel and click Backup and Restore option.

click backup and restore

Step 2: Click Restore my files button.

click restore files

Step 3: In the new popup window, click Search button.

search

Step 4: In the search box, type .mp4 and click Search button. Then all the video files are displayed on the screen. Check the checkbox of the video that you want to restore and click OK button.

select the videos that you want to restore

Step 5: Click Next button.

next

Step 6: Select a location and click Restore button.

restore

Step 7: Finally, the deleted video is restored successfully. However, the downside of this way is that you just can restore one video file at one time.

finished