An ISO image file is an archived document that contains all kinds of content: applications, music, videos, installation files, and so on. You can easily create ISO files from files, folders, and CD/DVDs. But if you get an ISO file from others, how can you view the contents without burning it to a disk or a drive? You can get multiple ways to open and extract ISO files on Windows 10 computer.
- Way 1: Double-click to mount ISO files to view contents
- Way 2: Mount ISO image from the context menu
- Way 3: Mount ISO Image from the ribbon menu
- Way 4: Extract ISO files via WinRAR
- Way 5: View ISO files contents with iSunshare ISO Genius
Way 1: Double-click
to mount ISO files to view contents
There is a built-in disk image tool in Windows 10 computers
so that you can easily mount the ISO image file to a virtual disk. You can
easily open the virtual disk to see all contents extracted from the ISO file.
Step 1: Navigate to the folder where the ISO image file is
located.
Step 2: Double click on the ISO image file to mount it.
Step 3: Once mounted, you will be directly guided to a DVD drive under This PC. Here you can view all the files and folders that are stored in the ISO image. You can directly open the files or folders to get what you want.
Way 2: Mount ISO
image from the context menu
Alternatively, you
can mount an ISO image from the context menu.
Step 1: Go to where your ISO image file is stored. Right-click it and then you can choose the Mount option from the context menu.
Step 2: In no time, you can see all data extracted in a virtual
drive. Here, you can easily manage the contents the same as you are on the
real disk in Windows 10.
Way 3: Mount ISO
Image from the ribbon menu
You can also open and view the contents of the ISO image from
the ribbon menu.
Step 1: Reach the ISO image file on your computer and then
choose it.
Step 2: Click the Disc Image Tools on the ribbon menu.
Step 3: Choose the Mount option. Immediately you can get all contents from the ISO mounted to a virtual disk.
Way 4: Extract ISO
files via WinRAR
WinRAR is a popular compression tool as well as an archiver
extractor, which needs to pay for usage. But you can enjoy a free trial period
to compress and extract the files. This tool can also help to extract files from disk images on Windows 10.
Step 1: Download and install WinRAR on your computer.
Step 2: Navigate to your ISO file. Right-click on it and choose Extract to “filename”.
Step 3: Soon, all contents of the ISO image are extracted to a folder with the same name.
Way 5: View ISO files
contents with iSunshare ISO Genius
iSunshare ISO Genius
is the free ISO file extractor for PC that can help you to extract all contents from the
ISO file. You can also burn the ISO file to a USB drive and create a unique ISO file
with this free utility. If you are running Windows 7 or the lower version, the
Windows disk image tool is not available for you. You can free download this software to
extract and view ISO file contents. ISO Genius is compatible with all Windows
operating systems.
Step 1: Download and install iSunshare ISO Genius on your
Windows 10 computer.
Step 2: Run the software and then choose the Extract module.
Step 3: Click the folder icon to select the ISO file to extract.
Step 4: Instantly, you can check the files and folders from the ISO file. Until now, it is unavailable for you to open the files. You need to choose the files or folders to export. After you make the selection, click the Export button on the bottom right corner.
Step 5: Select a folder on your Windows 10 computer to save the extracted content.
Next, click the Start button to export the extracted contents to your computer.
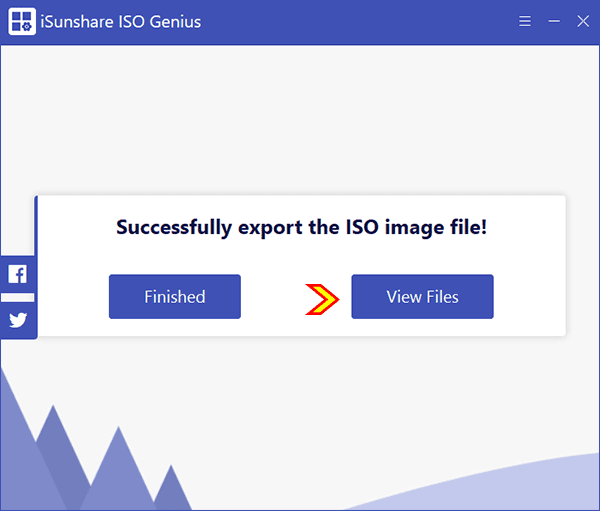
Step 6: Successfully exported the extracted contents from the ISO image. You can click View Files to open and view the contents.
Related Articles:
- How to Make Windows 10 Bootable USB from ISO Image
- How to Burn ISO to USB File on Windows 11/10/8/7 Computer
- How to Create ISO Files in Windows 10 Computer


No comments:
Post a Comment