January 28, 2019

How to Access USB Flash Drive with BitLocker Password Protection on macOS

Although Microsoft does not enable BitLocker feature on macOS & Mac OSX, there is an intelligent way to decrypt the USB which is encrypted with BitLocker on Mac. Now let’s explore how to unlock the USB on Mac with BitLocker Genius.

Why Choose iSunshare BitLocker Genius?

iSunshare BitLocker Genius is the useful and secure BitLocker reader for Mac which enables users to open/ read/access the BitLocker encrypted USB without any data at risk. Within several clicks, you can decrypt the USB on Mac and move the files or images between the USB and Mac. This software offers you two ways to unlock the drive: use the BitLocker password or the Recovery key file. There is no doubt that it is extremely easy to get the USB decrypted with the encryption password.


Step 1: Launch the software and insert the USB on Mac

First of all, you should be the paid user of this software so that you can enjoy the full features. After the download and installation process, you can insert the USB into Mac laptop and then you will get it appeared on the software user interface as the screenshot showcases.

open BitLocker Genius


Step 2: Select the USB and click the Unlock Button

The disk with the “bitlcoker” Mask should be chosen here. Only after you make your option, the Unlock button will display on the toolbar. Click it without hesitation as you can. It will not cause any data loss.

Unlock the BitLocker encrypted USB


Step 3: Mount the USB with BitLocker Password

In this interface, you can enter the password for the BitLocker USB or use the recovery key file to decrypt the USB. Undoubtedly, the password is the top-priority option for most of the users. After you input the password, it is time to click the Mount button.

Mount the BitLocker disk with password


Step 4: Open, read and access the USB drive


By now, the USB drive is decrypted on the desktop and you can simply open, read and access it as freely as you are in Windows PC. The USB drive is on your control now. You can add files into the drive or copy the files from the drive to Mac. If you finish all you want to do with the USB on Mac, you can click the Eject button on the toolbar. All the data will be kept safely on the USB. 

Access BitLocker encrypted USB on Mac

Related articles: 


December 26, 2018

How to unlock an excel spreadsheet when forgot password

I had a problem on opening the password-protected Excel workbook recently. I asked the person who built the Excel for the password but he failed to remember it. My document is in Excel 2010 so that I search online about how to unlock an Excel spreadsheet. In the following, I will tell you my test in details.


how to unlock Excel


Test 1: Try to unlock the Excel with VBA mode

Just as the screenshots, I found the specific steps to open Excel file without the password. It said that you could enter the VBA mode to copy the code for password recovery. But I failed at the first step.

unlock Excel with VBA mode


When I opened my Excel spreadsheet, there was only a box asking me to enter the password. There was nothing when I entered Alt + F11. If I closed the file and did the operation again, I could open the Visual Basic Editor. However, there is nothing I need and I am unable to open the locked Excel. I gave up this way and summed up the reason: the failure may cause by the multiple sheets in my Excel document.

enter Excel password


Test 2: Recover the password with iSunshare Excel Password Genius

I know this Excel password recovery software from a forum. As I failed in the VBA mode which is recommended by most sites, I decided to try iSunshare Excel Password Genius. I had some doubts about whether it can recover my Excel password and whether it will damage my data. Considering this factor, I did not purchase the full version at once.

As they provide the free version that can recover the password within three characters, I downloaded it on my computer. At the same time, I created another password-protected Excel which I know the password. According to the tutorial, I added the encrypted Excel file and chose the password recovery method—Normal. As this is my first time and I know the password, I just set the details with the confirmation to All digits option. These can be done in minutes.

recover Excel forgotten password with Excel Password Genius


At last, I clicked the Start button and wondered whether it could give me the right password. To my surprise, I got the password result within minutes. Of course, I opened it directly to verify whether there was data loss. Luckily, nothing has been changed.

get the recovered password


You can guess what I do next. I purchased the full version in $19.95 without hesitation and get my complex password for the Excel workbook which I forgot the password. Attention, for this password recovery, it needs more time than the one I tested.


Test 3: Remove Excel password

I noticed that iSunshare also developed the Excel Password Remover that can help to remove the forgotten password within one click. Therefore, I think it would be a better way if it could help me remove Excel 2010 password. But I was told that it could only support MS Excel 97/2000/2003/XP. Hope it can be improved in the future.


December 3, 2018

How to recover iTunes backup password from PC


For iPhone users, iTunes backup is an important way for them to store photos, music and other data. And most of us will set a password to protect the iTunes backup data from stealing. It is super easy for you to get access to the backup with password. However, when you forgot iTunes backup password, the iPhone backup locked you out of the data you need, how to recover iTunesbackup password from PC? Most of us know that there is no way such as Apple online customer service to retrieve the password. In a situation like this, we summed up two methods here which is proved effective by other users.

Method 1: Test all possible passwords


In this situation, when we get the incorrect password message, what comes to our mind at the first time is to test all possible passwords we may use. For that there are a bulk of passwords using in our daily life, we may mix them up, you can write down the most frequently passwords you use and input it one by one to guess the right password. You can try:
how to recover iTunes password from PC


l  Your iCloud password or the Windows login password.
l  Your birthday or the Memorial Day.
l  The simple combination of digits and alphabets, such as abc123.
l  The social media login password or your phone number.
l  Ask your best friends or family to provide some passwords they know

Method 2: Use iTunes backup password recovery tool (Windows/Mac)

If you fail to think of the iTunes backup password, in order to help you out of the trouble, you should try the iTunes backup password recovery tool to begin the automatically guessing process. At this time, considering all aspects of the software, such as compatibility and price, most of the websites recommend iSunshare iTunes Password Genius, which is the most trust-worthy tool within the industry. There are two versions of this iTunes backup password recovery tool: Windows and Mac. In addition, the software is developed with four password recovery methods for user options. You can free download the iSunshare iTunes Password Genius Mac  trial version to have a test.

Here, I will take the Mac version of this iTunes backup password recovery tool as an example to show you how to process the automatically password recovery steps.

Step 1: Install the software on your Mac and run it.
For Mac users, they are familiar to the software install process. After downloading, you can drag the icon to the application folder and then click it to run the program.


Step 2: Import the encrypted iTunes backup files.

When you run the software, you will see the Open File button on the first line under the navigation bar. Click it and you can choose the iTunes backup file of your iOS device. If the software cannot detect your iTunes backup file, the software enables you to import the file manually by clicking Add File button.

how to recover iTunes password from PC

Step 3: Make a decision on the password recovery type

iSunshare iTunes Password Genius for Mac offers users four types: Brute-force, Mask, Dictionary and Smart. Just take the Brute-force as an example, you should click the Brute-force type and then give clues on the range, length, dictionary and so on.

how to recover iTunes password from PC


Step 4: Begin the password recovery process and get the password

It is super easy to make the software find the iTunes backup password for you. Click the Start button and you just need to wait for the last result. Once it successfully gets your right password, it will show it to you at once. Of course, if you have something emergency to do, you can stop the process and when you run it next time, it will continue it automatically.

how to recover iTunes password from PC


Now, you will never be puzzle about the how to recover iTunes backup password from PC. Go and have a test by yourself now.  

Related articles about iTunes : 


November 28, 2018

how to back up your iPhone through iTunes


Everyone will have the precious memory which is stored in the iPhone. When you see the photos, videos or messages, something unforgettable will come to your mind. Yet, there is no doubt that the iPhone has the large storage for the files. But I think all your data should be treated as much. It is necessary to backup iPhone data through iTunes. You should keep it as a habit to protect your important data.

Learn the definition of backup

Here comes to the question: what’s a backup? By definition, a backup for your iPhone will include everything: iPhone settings, app data and organization, iMessages, photos, videos and more. For iPhone users, they can back up the data through iCloud and iTunes. If you get used to backup data via iCloud, you can reach the data stored in the iCloud at anywhere only if you connect the iPhone with Wi-Fi. For the iTunes backup, it is possible to access with the help of a computer in that all data is kept safely on your Mac or PC.

backup iphone through itunes


Steps to make a backup using iTunes on iPhone

You can turn on the automatically back up following this way: access iTunes > Device icon > Summary > This computer > Encrypt [device] backup. You need to create the password for backup protection. And then click Done to accomplish the setting.

If you want to back up the iPhone manually via iTunes, here are the tutorials.

Step 1: Connect your iPhone to the computer. You can use the Mac or Windows PC.
Step 2: Run iTunes and you will find there is Device icon close to the category dropdown menu. Click it and choose Summary from the sidebar.
Step 3: Under the Manually Back Up and Restore, you will find the option Back Up Now. Click it and you will get the Done option to end this setting.

backup iphone through itunes


Extra tips: Forgot iTunes backup password, what can I do?

As we know that there will be a password set to protect the iTunes backup, you cannot access to the iTunes and reach the important data if you forgot the password. And there is no way to retrieve the iTunes backup password unless you utilize the third party software. iSunshare iTunes Password Genius is one of such iTunes backup password recovery software that can help to recover iTunes backup password. You just need to import the encrypted files and set the password recovery method, the software can automatically find your password.


iTunes backup password recovery software


All in all, it just cost you minutes to backup the iPhone through iTunes. But you can benefit a lot for a long time. Go and back up the impressive photos, videos, and messages now.

More articles about iPhone: 


November 14, 2018

Solved--my laptop is locked how I unlock it


Help! I am in terrible trouble. My HP laptop is locked how I unlock it. I failed to figure out the correct password. I need to login the laptop to get my preparation for the final exam! Is there any way I can unlock it without the password?”

In this situation, the users forgot the Windows login password and made the laptop locked. Here we carried out three methods which can help solved this issues.

Method 1: Unlock HP laptop with third party software

In this situation, we do not know which Windows system the HP laptop is installed. Therefore, the users can remove Windows password with the Windows password remove software. iSunshare WindowsPassword Genius is one of the such software that makes password remove easily.

How iSunshare Windows Password Genius can help unlock HP laptop?

Here, you should firstly prepare a USB and an accessible laptop for the password reset disk creation. It is also important to make the USB with enough capacity to store the software.

1.      Download the program on another accessible laptop and install it.
2.      Run the software and choose USB as the media type. Star the process of burning the password reset disk.
3.      Restart the locked laptop and press the boot key F9 all the time until it shows you the boot menu. Choose to boot the computer from USB device.
4.      Now you can see the iSunshare Windows Password Genius interface and choose the windows and users account. You need to click the Reset button and make the password empty. In this way, you remove the original password. Lastly, reboot the laptop so that you can enter without password to prepare your final examination.

remove HP laptop password


Method 2: Unlock HP laptop with a password reset disk

I doubt that when your laptop is locked, you are all in mess without knowing how to do. Actually, perhaps you have created a password reset disk before. At this time, you should calm down and find where the reset disk is. You can use it to reset the Windows password at once.

1.      Connect the disk with the locked laptop and restart it.
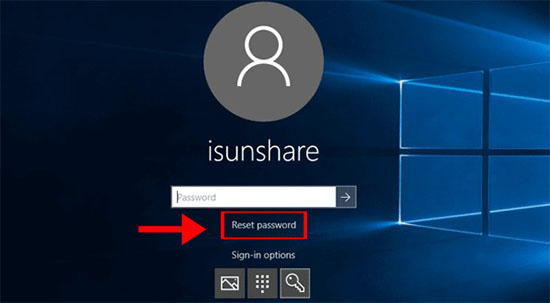
2.      When it asks you to enter the password, you can enter the wrong password for several times. In the end, you will get a notice on Reset Password.
3.      Follow the steps on Password Reset Wizard to reset the HP laptop password. The Password Reset Wizard will guide you to successfully reset the password.


reset HP laptop password


Of course, there are many other ways to reset or remove HP laptop Windows login password, such as factory reset. Considering that the users still need to the data to prepare the final exam, we do not recommend this way in that it will cost the loss of all computer data.


Related Articles:


October 31, 2018

Should I update to iOS 12 and how to do it?


After iOS 12 came into mobile market, iPhone XS, iPhone XS Max and iPhone XR is being the hot topic. From Apple newsroom, we know that iOS 12.1 will be available at the end of October. Now, we have the question: as iOS12 is released with powerful functions, why iOS 12.1 comes in such a short time? Does it mean that iOS 12 has something to be improved? And as the iPhone and iPad users, should I update to iOS 12 and how to do it?

Reasons—you should update to iOS 12

1.      Delightful experience in speed

The reason why many people desire to use iPhone or iPad is for its fast and responsive performance. As the developers have fixed most common iOS 11 bugs in iOS 12, it is up to 70% faster when you swipe to camera and 50% faster for keyboard display. When you launch app under heavy workload, it is up to 2x faster. Update to iOS 12, you can enjoy the unbelievable faster and more responsive experience in speed.

2.      Group FaceTime and Memoji & Animoji usage


Now, it is possible to group Facetime for up to 32 people at once with the dynamic UI. Moreover, you can use the vivid Memoji which you make it with your own personality in FaceTime to express yourself. There are also four new Animoji which can be used for FaceTime call. All these changes make FaceTime more useful and funny.

iOS 12 update


3.      Screen Time control

Sometimes, we will addict to the iPhone and iPad so that we forget everything we need to do as the using experience is extremely fantastic. The Screen Time function helps us know more about our activities on the device, such as the time spending on Facebook and the time playing games. In order to manage the limited time, you can set the control on how much time you should spend on certain apps. This feature also supports Family Sharing. In other words, you can take the Screen Time control of your kids’ device, such as setting limits on his time spending in the games. I think the parents will think highly of this function.

4.      Intelligent Siri for better life

With the new update, Siri becomes more intelligent so that it can recommend you to add custom shortcuts even using the third-party apps. For example, if you get used to enjoy a cup of coffee in Starbucks in the afternoon, Siri will learn your routine and give your suggestion on when to place your order from the Lock Screen. It is said that you can also make shortcuts work with your voice. Besides, Siri can help you do more to make your life better, such as find out the password for you in minutes.

5.      Smart control for the notifications

You will get annoyed when receiving constant notifications from the apps. In iOS 12, the notifications can be grouped together based on app or topic. You can also set Quiet notifications which will never bother you. Besides, the intelligent Siri can also give your suggestions about the alerts according to your interaction with them.


iOS 12 update


6.       Backup your password automatically

As we apply the unique and complicated password to every app and website to protect the information, it is common for us to forget the login password. But in iOS 12, you can get all passwords automatically created and saved in Safari and in apps. In this way, you will never worry about the password forgotten issues.


How do I update to iOS 12?

Step 1: Check whether your device is compatible with iOS 12 or not

If your device can run on iOS 11, it can also run on iOS 12. For the iPhone, iPad and iPod devices that support iOS 12, you can have a check according to the list comes from Apple official website.


iOS 12 update


Step 2: Create a backup for your data

In case of the data loss, you can your iDevice data to iCloud or iTunes. It is important to do the backup before your iOS update every time. As for the iCloud backup, you can login your account and click Back Up. For the iTunes backup, you need to run iTunes on computer and connect iDevice with it. Tap File>Devices>Backup and then wait for the backup finish.

Step 3: Update to iOS 12

There are two methods you can update your iDevices to iOS 12. One is to update them to iOS 12 wirelessly; the other is to update manually with iTunes. For the first method, you need to connect the Internet via Wi-Fi and make your iDevice full of power. Then choose Settings > General > Software Update> Download and Install > Install. If asked, enter your passcode.

iOS 12 update


As to the second method, you should download and install the latest version of iTunes on your computer. After setting your iDevice connected with the computer, open iTunes and select your iDevice, choose Summary > Check for Update > Download and Update. At last, enter your passcode for your iOS device and wait for the end of update patiently.


Related articles:


September 23, 2018

The Ultimate Guide to Create New Virtual Machine in Hyper-V Manager

Since Windows 8 released, Microsoft lets us create new virtual machine in Hyper-V manager to run multiple operating systems. Hyper-V is a virtualization production that based on hypervisor technology. After a long period of confusion, I discover the easiest way to set up VM in Hyper-V Windows 10.

How to Create New Virtual Machine in Hyper-V Manager Windows 10


Different from VirtualBox and VMware Workstation, Hyper-V is a Windows built-in feature that requires your computer supports virtualization technology. Besides, Hyper-V is suitable for all 64-bits versions in Windows 8 and later except for Windows Home edition.

Step 1: Enable virtualization in BIOS.


1. Hit hotkey, for instance, Delete to access BIOS settings;
2. Go to Security > System Security > Virtualization Technology and select Enable.


Step 2: Enable Hyper-V in Control Panel.


1. Type Turn Windows features on or off in the Windows search bar and hit Enter on the result;


2. Check the box of Hyper-V and tap on OK. Restart your computer to take effect.


Step 3: Create New Virtual Machine in Hyper-V Manager


1. Type Hyper-V in the search bar and select from the result.


2. Click on Action > New > Virtual Machine;


2. Follow the New Virtual Machine Wizard to create new VM in Hyper-V Manager. When asked about Installation Options, select Install an operating system from a bootable CD/DVD-ROM then locate to the ISO file.


If you want to create virtual machine with PowerShell, you can refer to How to Create a Virtual Machine with Hyper-V/ PowerShell in Windows 10.